Hey there, beautiful souls!
Let’s Tie-Dye!
 Are you ready to add some color to your life? Tie-dying is a fun and easy way to create unique and vibrant designs on your clothes.
Here are some simple instructions:
Materials:
- White cotton clothing
- Fabric dye
- Soda ash
- Plastic squeeze bottles
- Rubber bands
- Latex gloves
Instructions:
- Wash your clothing item to remove any dirt or chemicals that could prevent the dye from adhering properly.
- Soak the item in a solution of soda ash and water. This will help the dye stick to the fabric. Follow the instructions on the package for the correct ratio of soda ash to water.
- While the item is soaking, prepare your dye. Mix the dye according to the instructions on the package. It’s best to use plastic squeeze bottles for easy application.
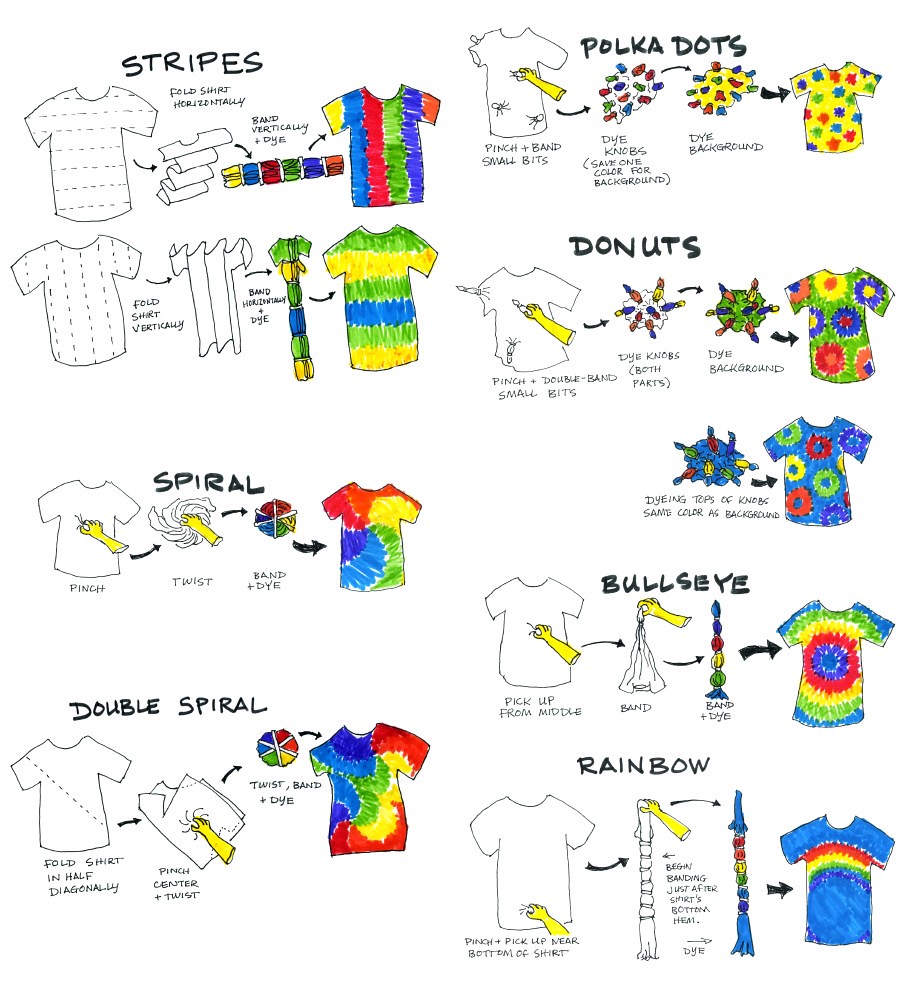
- Once your clothing item is done soaking, wring out the excess water and lay it flat on a surface. Now it’s time to create your design! Use rubber bands to create patterns and divide the fabric into sections that will be dyed different colors.
- Apply the dye to each section, making sure to saturate the fabric with color. Use a different squeeze bottle for each color.
- Once you’ve applied all the dye, cover the clothing item in plastic wrap to keep it moist. Let it sit for at least 6-8 hours or overnight for best results.
- Rinse the item in cold water until the water runs clear. You can also use a small amount of detergent to remove any excess dye. Be sure to wear gloves to prevent staining your hands.
- Hang the item to dry and admire your beautiful and unique creation!
Now that you know how to tie-dye, there’s no limit to the designs you can create! Play around with different colors and patterns and make your clothes truly one-of-a-kind. Happy tie-dying!