Roses are one of the most popular and beloved flowers in the world. They come in different colors, sizes and shapes, but one thing is constant - they all have a special place in our hearts. And what better way to express our love and appreciation for roses than making origami roses?
Origami Rose
 Origami is an art form that originated from Japan. It involves folding a piece of paper into different shapes and objects without the use of scissors or glue. Origami has been around for centuries and it continues to fascinate people of all ages. Today, we will learn how to make an origami rose.
Materials Needed:
- Square sheet of paper (preferably red or pink)
Instructions:
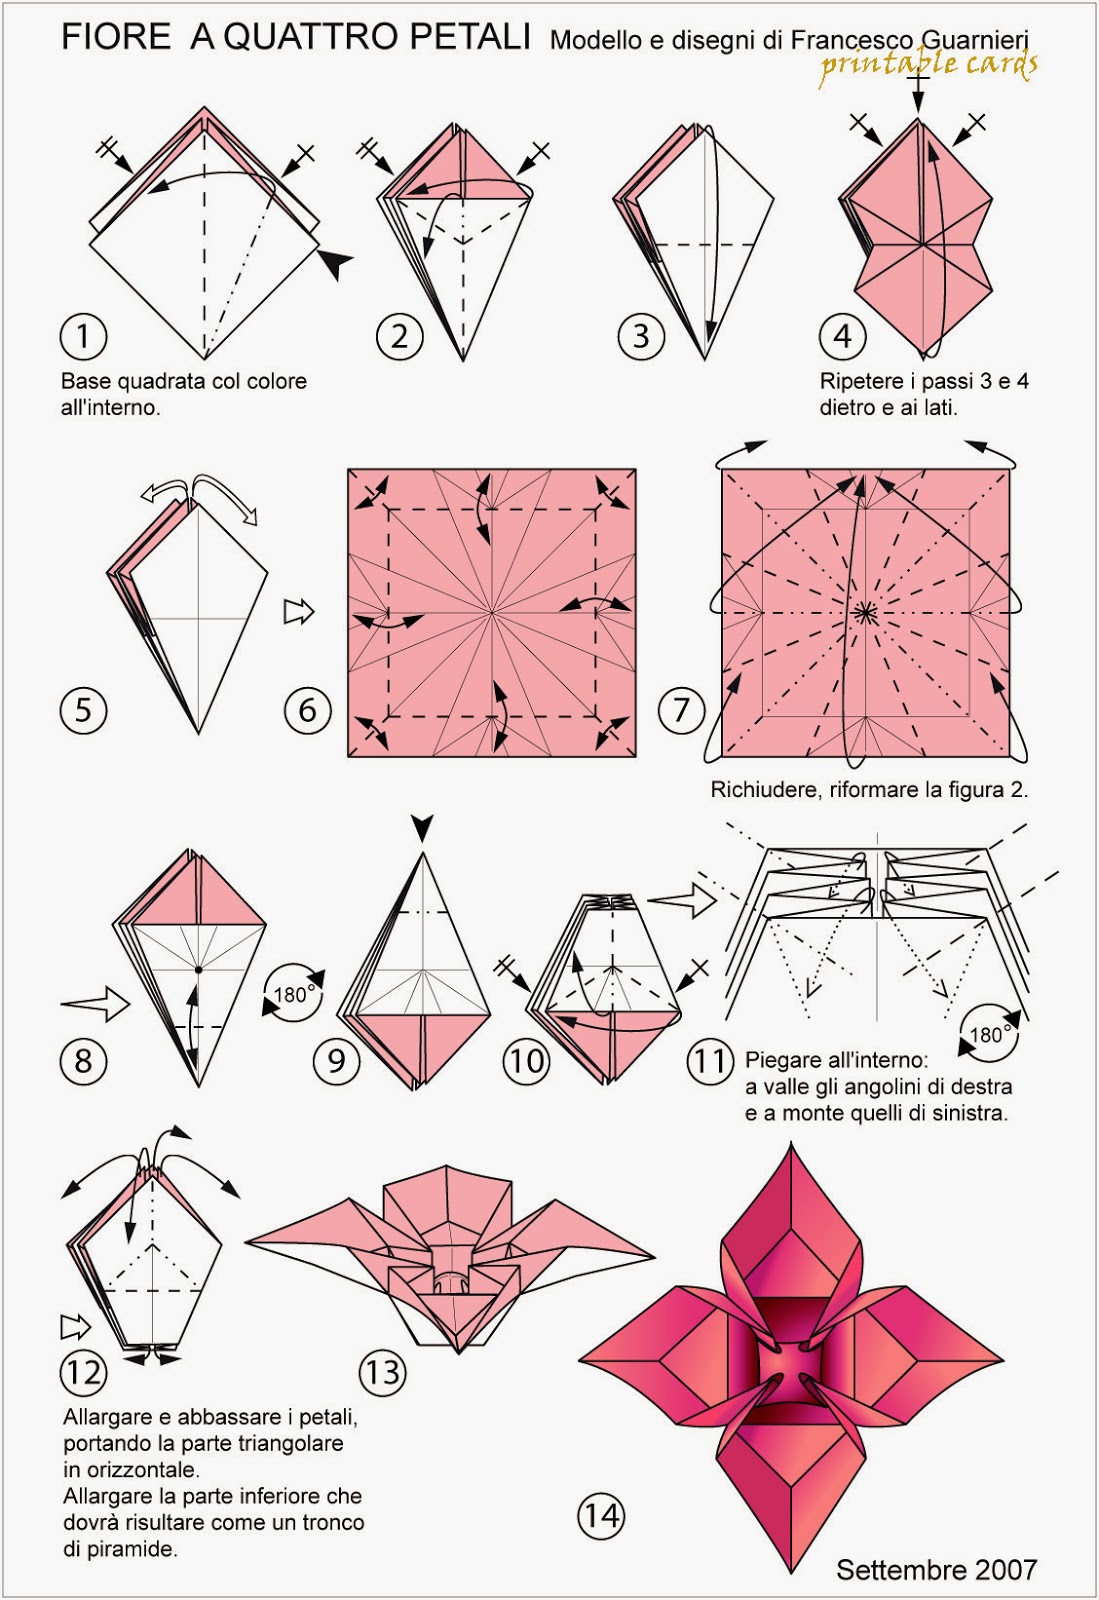
Step 1:
Take the square sheet of paper and fold it in half diagonally. Then, unfold and fold it in half diagonally in the opposite direction.
 ### Step 2:
Next, fold the paper in half horizontally and vertically, then unfold. You should see crease lines forming an X and a cross.
 ### Step 3:
Fold the corners of the paper towards the center, aligning them with the crease lines on the paper. Repeat this step with all four corners.
 ### Step 4:
Fold the paper in half vertically and horizontally, then unfold. You should see crease lines forming a grid on the paper.
 ### Step 5:
Fold the corners of the paper towards the center again, aligning them with the crease lines on the paper. Turn the paper over and repeat this step with all four corners.
 ### Step 6:
Fold the paper in half diagonally in both directions, and unfold. You should see crease lines forming an X and a cross on the paper.
 ### Step 7:
Now, push the corners towards the center of the paper, forming a triangle.
 ### Step 8:
Take one corner of the triangle and fold it towards the center crease line, forming a smaller triangle. Repeat this step with the other two corners.
 ### Step 9:
Fold the bottom corner of the paper towards the top, aligning it with the top corner.
 ### Step 10:
Next, fold the sides of the paper towards the center crease line.
 ### Step 11:
Now, fold the paper in half vertically along the center crease line.
 ### Step 12:
Take the bottom corner and fold it towards the top of the paper, forming a small triangle.
 ### Step 13:
Tuck the small triangle under the layers of paper at the bottom. This will form the base of the rose.
 ### Step 14:
Gently separate the layers of paper to form the petals of the rose. You can adjust the petals to create the shape and size of the rose that you desire.
 Congratulations, you have just made an origami rose! You can use it to decorate your home or gift it to a loved one. Origami roses are not only beautiful, but they also represent patience and dedication. The process of folding the paper into a rose takes time and effort, but the end result is worth it.