Oh my goodness, have you seen this adorable dog bandana pattern and tutorial? It is simply paw-some, and I cannot wait to get started on making one for my furry friend.
Step One: Gather Your Materials
 First things first, let’s gather up all the necessary materials for this project. You will need:
- Cotton fabric (the example shows a cute polka dot pattern)
- Matching thread
- Sewing machine or needle for hand-sewing
- Fabric scissors
- Ruler or measuring tape
- Straight pins
Step Two: Cut Your Fabric
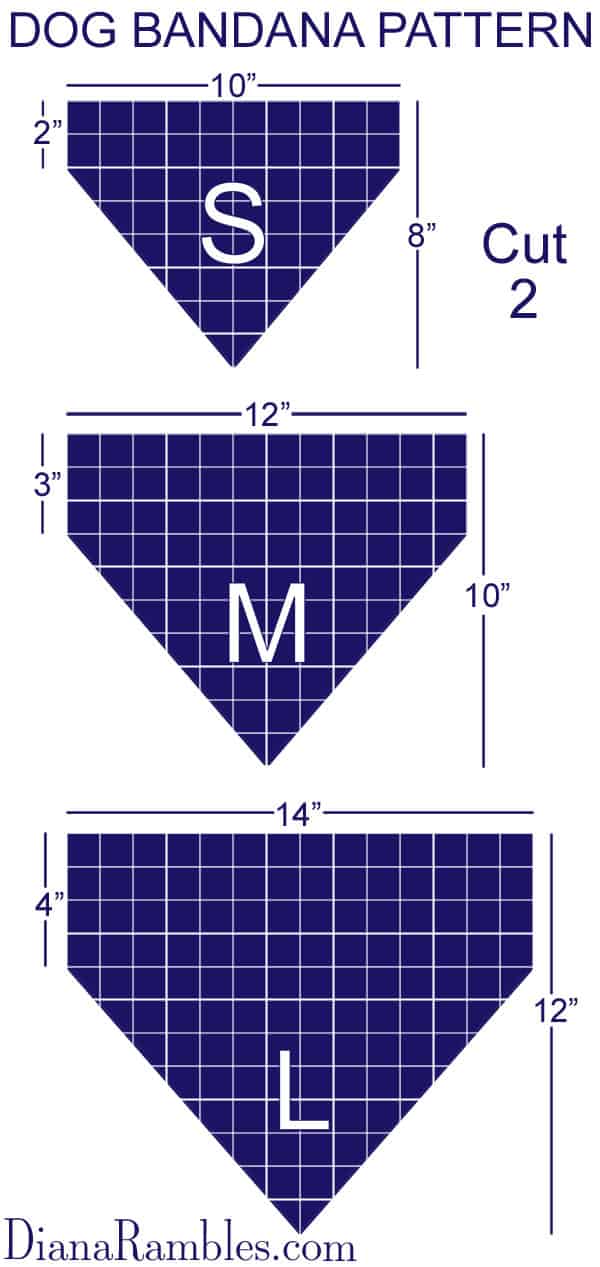
 Now that you have all your materials, it’s time to cut your fabric. Here are the measurements you will need:
- Small dog: 7 x 14 inches
- Medium dog: 9 x 18 inches
- Large dog: 12 x 24 inches
Once you have measured and marked your fabric, use your fabric scissors to cut out the appropriate size for your furry friend.
Step Three: Fold and Pin
 Now that you have your fabric cut out, fold it in half lengthwise with the right sides facing each other. Use your pins to hold the two sides together.
Step Four: Sew It Up
 You’re almost done! Now it’s time to sew up the edges. Leave a 2-3 inch opening at the end so you can turn the bandana right side out when you’re finished sewing.
Step Five: Turn It Inside Out
 Now that your bandana is all sewn up, it’s time to turn it inside out by pulling it through the small opening you left in step four. Use a pointed tool, such as a pencil, to help you turn out the corners and to make sure the bandana looks crisp and clean.
Step Six: Finishing Touches
 You are almost finished! Now it’s time to close up the opening by hand-sewing or machine-sewing the final opening shut. Don’t forget to iron your bandana to make sure it’s nice and smooth.
The Final Product
And voila, you now have a beautiful, handmade bandana for your furry friend. Not only will it make them feel special and loved, but it will also keep them looking stylish and trendy.
So what are you waiting for? Grab your materials and get to work on your very own dog bandana. Your furry friend will thank you for it!