Have you ever wanted to give your kitchen a fresh new look without having to break your budget? One of the easiest ways to do this is by changing your cabinet hardware. With the right cabinet pulls and knobs, you can turn a drab and outdated kitchen into a modern and stylish one in just a few easy steps. And the best part is, with the help of these free printable cabinet hardware templates, you can achieve professional-looking results without the hassle!
Step 1: Gather Materials
 The first step in changing your cabinet hardware is to gather all the materials you will need. This includes your new cabinet pulls or knobs, a screwdriver, a pencil, a ruler, and of course, your free printable hardware template. You can easily find these templates online and there are many to choose from. These templates will save you time and effort in measuring and drilling holes for your new hardware.
Step 2: Remove Old Hardware
 The second step is to remove the old hardware from your cabinets. This is a straightforward process that involves using your screwdriver to loosen and remove the old screws that hold the hardware in place. Once you have removed the hardware, place it aside in a safe place in case you need to use it again in the future.
Step 3: Choose Your New Hardware
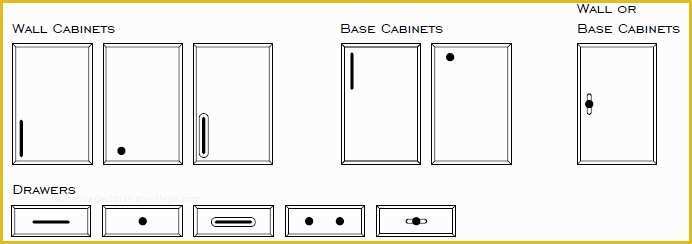
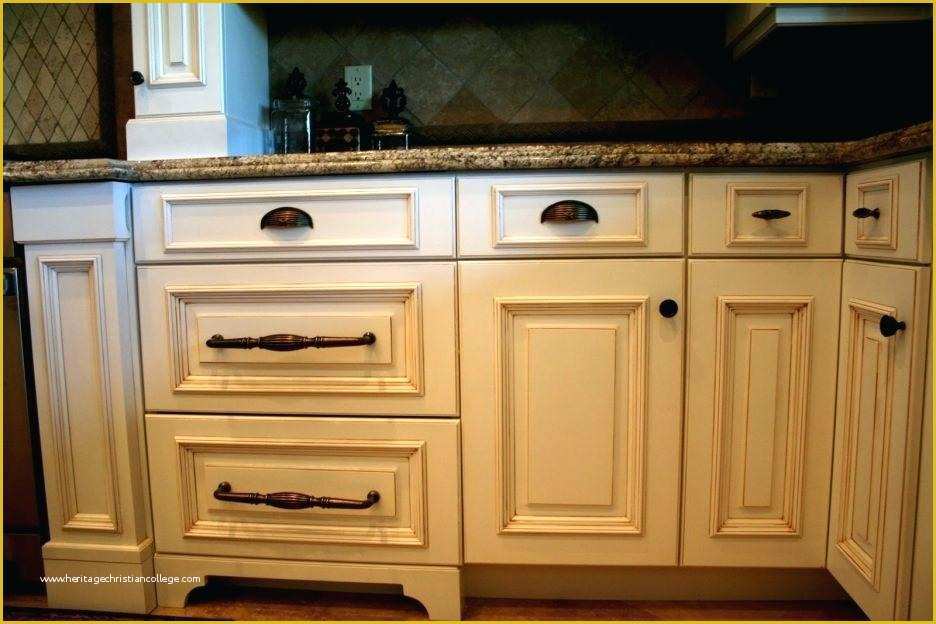
 The third step is to choose your new hardware. This is the fun part! There are so many different styles and designs to choose from, depending on your taste and the overall look that you are going for. You can choose from a wide range of cabinet pulls, knobs, and handles that come in different shapes, sizes, colors, and finishes.
Step 4: Print and Cut Out Your Template
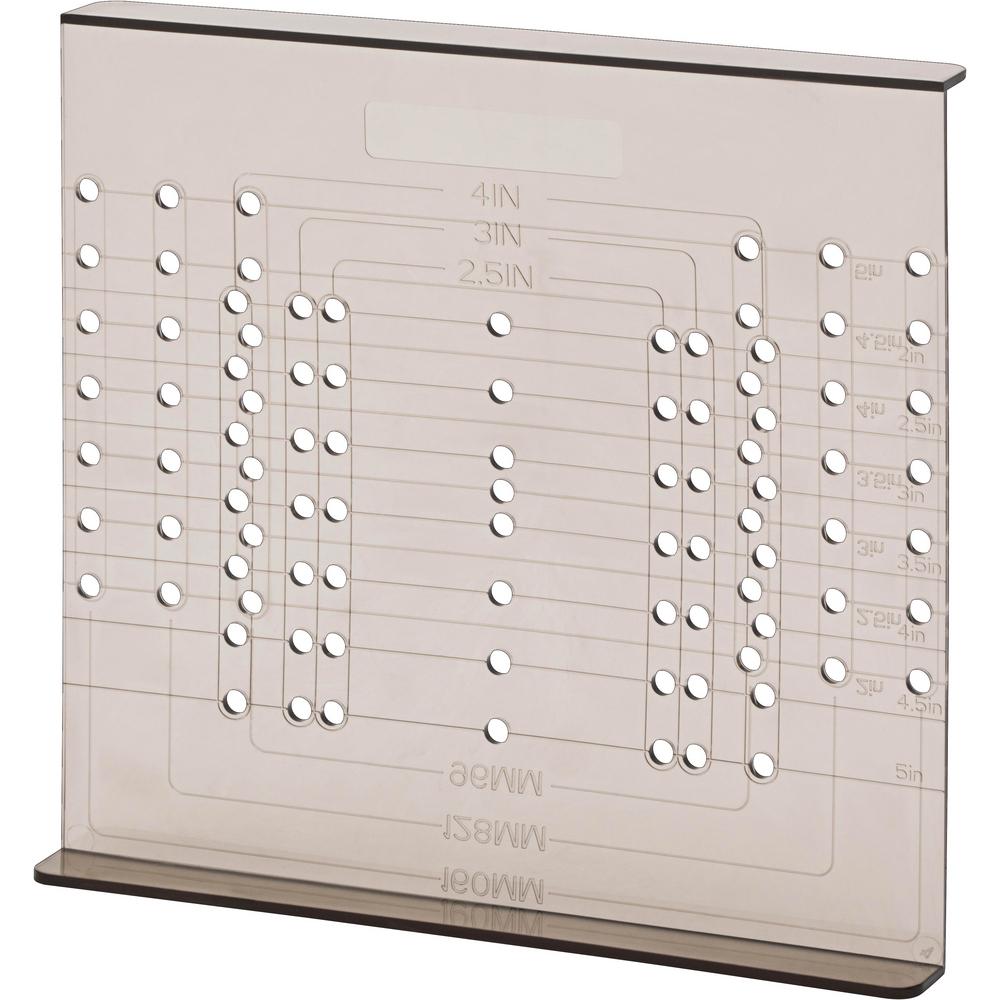
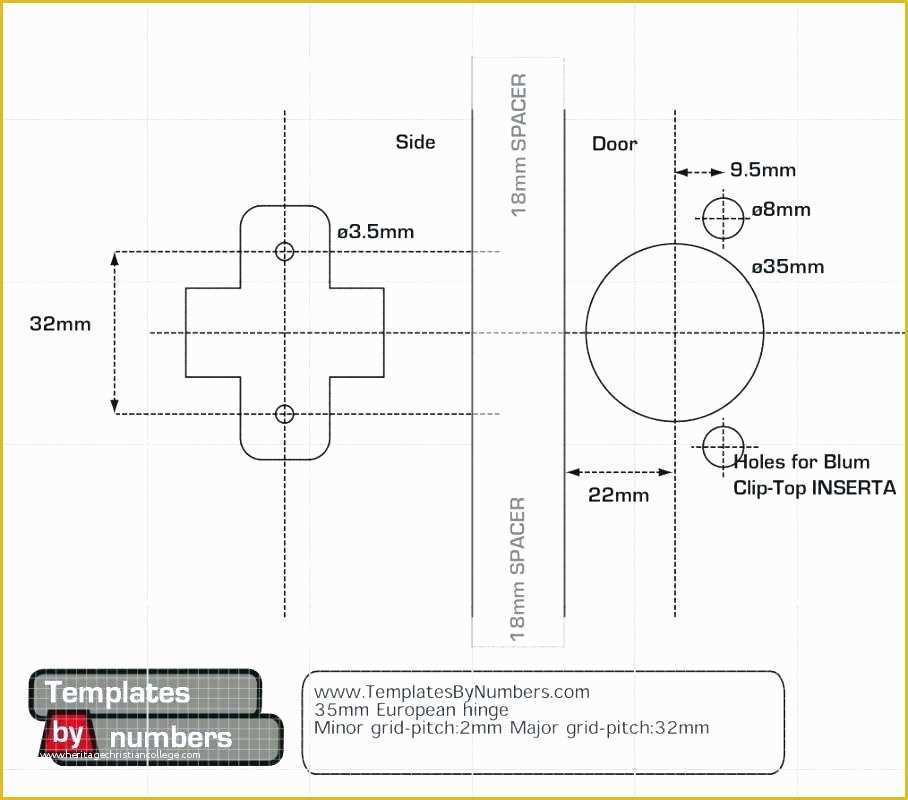
 The fourth step is to print out your free printable hardware template. Once you have chosen your template, simply print it out on a standard sheet of paper. You may need to adjust the size of the template to match your hardware, depending on the manufacturer’s instructions. Carefully cut out the template using a pair of scissors or a craft knife.
Step 5: Align Your Template and Mark the Holes
 The fifth step is to align your template with your cabinet door or drawer. Place your template on your cabinet door or drawer, using your ruler to ensure that it is straight and centered. Once you have aligned your template, use your pencil to mark the locations where you will need to drill holes for your new hardware. These marks will ensure that your new hardware is installed evenly and accurately.
Step 6: Drill the Holes
 The sixth step is to drill the holes for your new hardware. Using your marked points as a guide, carefully drill holes at the marked locations. Double-check the size and placement of the holes before you start drilling to ensure accurate installation.
Step 7: Install Your New Hardware
 The seventh and final step is to install your new hardware. Simply insert the screws into the holes that you have drilled, and tighten them using your screwdriver. Make sure that your new hardware is straight and secure. Check that the new hardware operates smoothly and efficiently.
There you have it – a quick and easy way to change your kitchen cabinet hardware and give your kitchen a new and updated look without having to spend a lot of money. Using free printable cabinet hardware templates can help you achieve professional results with ease. So what are you waiting for? Choose your template, choose your hardware, and get started on your kitchen makeover today!